How to Add New Admin Account Windows 7 Even You Locked Out
Usually you may give permission for other family members to use your Windows 7 computer. You need to add new user account to Windows 7 so they can use these new users to access your Windows 7 system. This article will show you two common ways to add new user account to Windows 7. If you need to add a user to administrator group, just follow method 3 to accomplish this task with CMD. If you have forgotten your admin password and lost access to your Windows 7 computer, you can follow method 4 or 5 to easily add new user account to Windows 7 without logging in. Then you are able to unlock your Windows 7 computer by using the new user account.
Method 1: Add New User Account to Windows 7 in Control Panel. (You Have Admin Privileges)
Method 2: Add New User Account to Windows 7 by Using Command Prompt. (You Have Admin Privileges)
Method 3: Add User Account to Administrator Group. (You Have Admin Privileges)
Method 1: Add New User Account to Windows 7 in Control Panel. (You Have Admin Privileges)
Commonly, to add new user account to Windows 7, admin privilege is needed. So, the first thing you should do is login Windows 7 as administrator. Then adding user account is extremely easy.
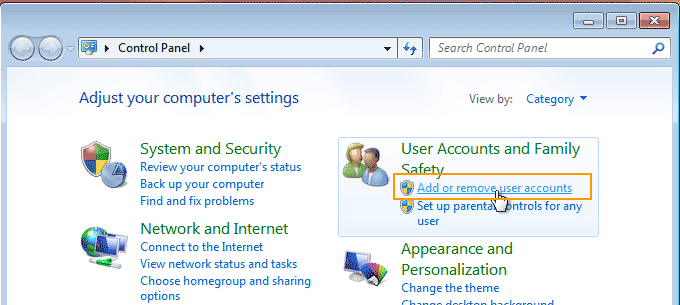
Step 1: Open control panel in Windows 7. Under “User Accounts and Family Safety”, select “Add or remove user accounts”.
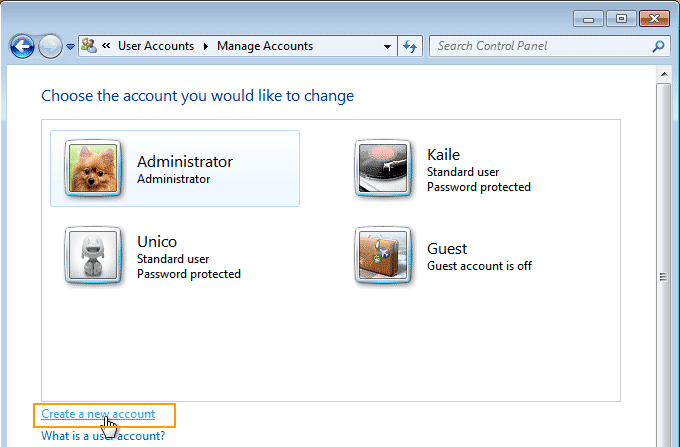
Step 2: Under user accounts list, select “Create a new account” link.
Step 3: Next, name the account and choose an account type. If you want to add an admin account, check “Administrator”. And then click “Create Account”. An admin account is successfully created. In next sign in, you can use this new account to log into Windows 7.

Method 2: Add New User Account to Windows 7 by Using Command Prompt. (You Have Admin Privileges)
To create new user account for Windows 7 system, there is another simple way. You only need to run a simple command in Windows 7, a new user account will be created. Of course, admin privilege is needed.
Step 1: Login your admin account in Windows 7. Click windows button. In the search box, type “cmd”. Right-click “cmd” in the search results and then choose “Run as administrator”.

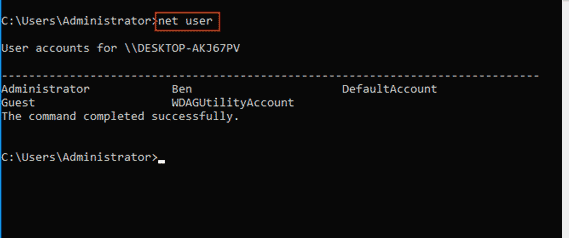
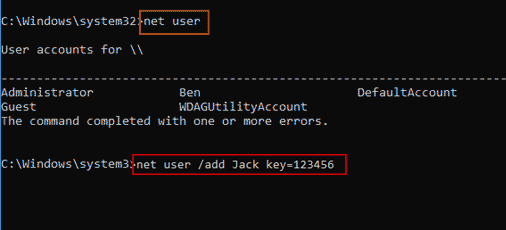
Step 2: Command window is open. Type “net user” and then press Enter key. All user accounts in this computer will be shown.
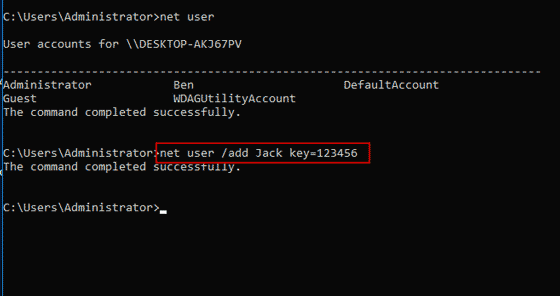
Step 3: To add a new user account, type “net user /add [username] key=[password]” and then press Enter key to run the command. When it shows “The command completed successfully”, the new user account is successfully created. Replace the username and password with yours.
Method 3: Add User Account to Administrator Group. (You Have Admin Privileges)
If you have created new user account to Windows 7 and need to give admin privilege to it, just need to change user type in Control Panel or run a simple command to add the user account to administrator group. Here are detailed steps.
Change user account type in Control Panel:
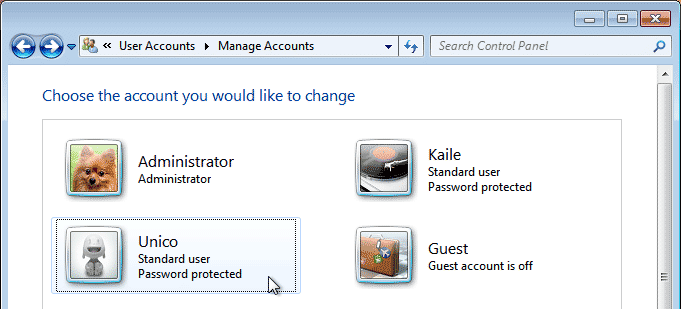
Step 1: Open Control Panel -User Accounts – Manage Accounts. Then choose a user account which you want to change its user type.
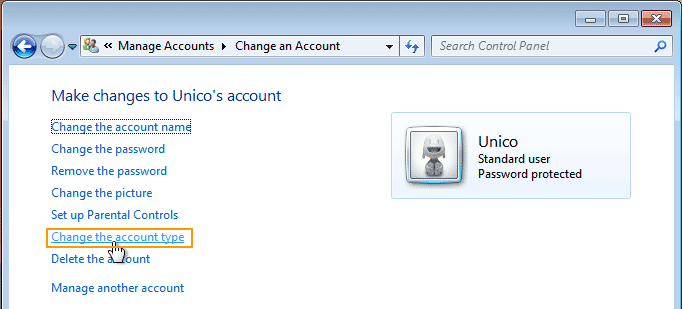
Step 2: Select “Change the account type” link.
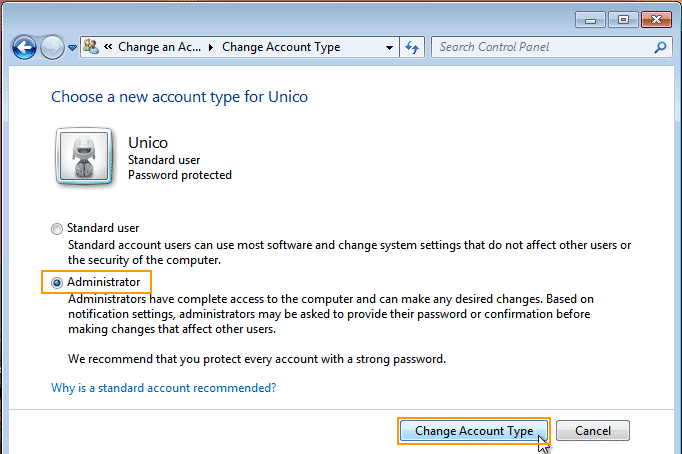
Step 3: Select “Administrator” and then click “Change Account Type”.
Add user account to administrator group:
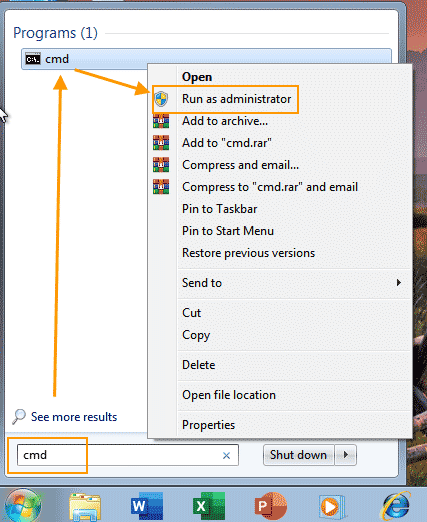
Step 1: Search “cmd” and then right-click “cmd” and select “Run as administrator”.
Step 2: To add a user account to admin group, run this command: “net localgroup administrators [username] /add”.
Replace the username with yours.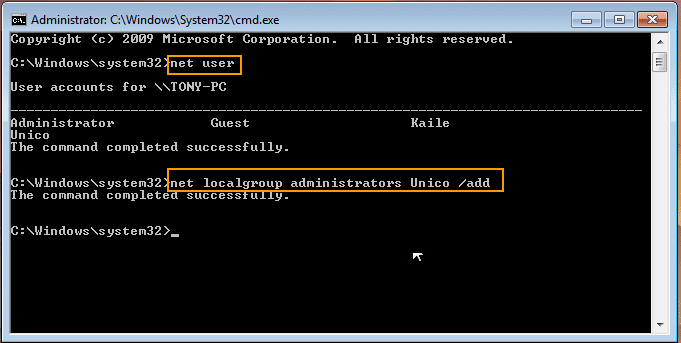
Method 4: Create New User Account for Windows 7 with Windows Installation Media. (Locked Out of Windows 7)
If you have forgotten your Windows 7 administrator password, this method can help you create a new admin account and then use the account to unlock Windows 7 system.
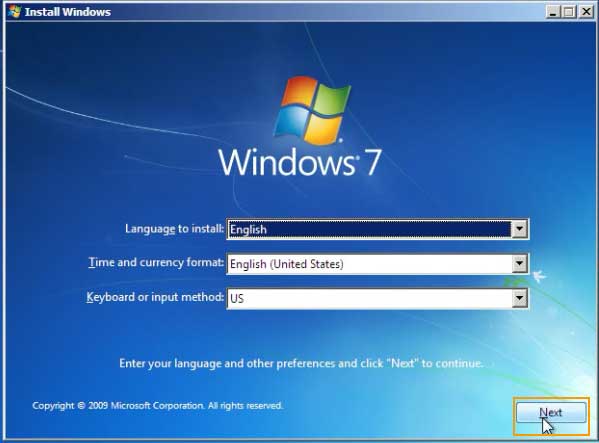
Step 1: Insert a Windows 7 installation media to your computer. Boot the computer from the media. When the following screen appears on the computer, select “Next” to continue.
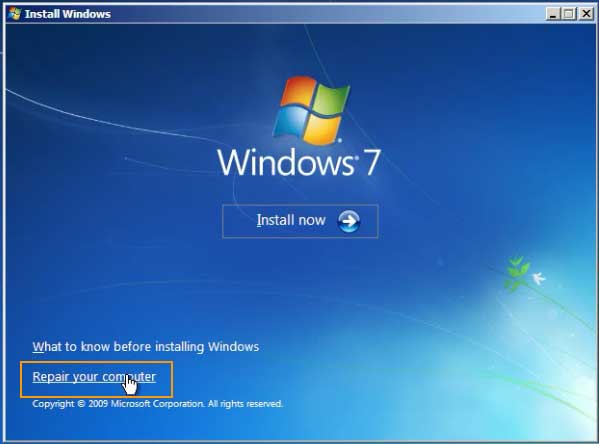
Step 2: In the Windows install screen, select “Repair your computer” link.
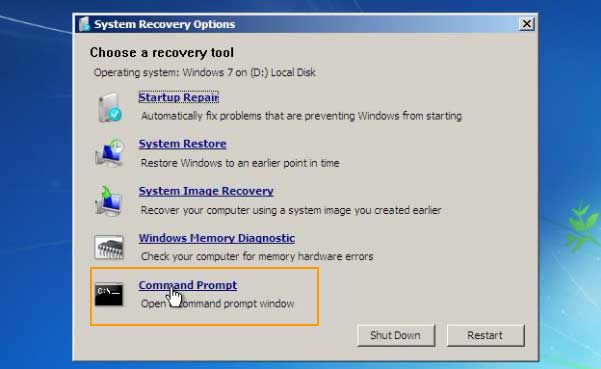
Step 3: Select your Windows installation drive and then click “Next”.

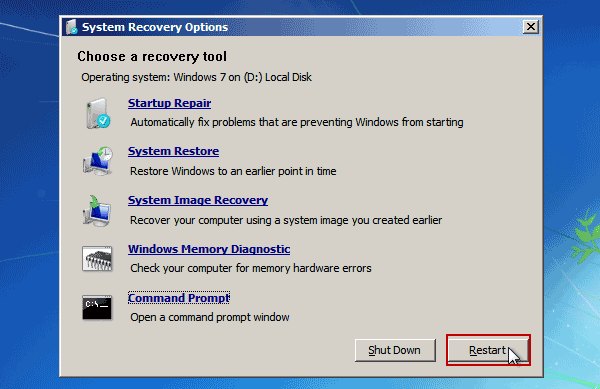
Step 4: Select opening “Command Prompt”.
Step 5: In the command window, type in the following commands and press Enter key after each command line.
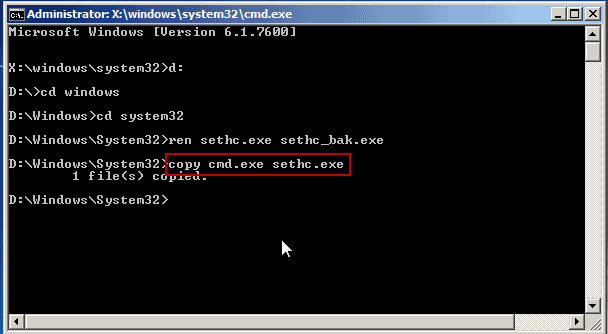
1. C: (or D:)
2. Cd windows
3. Cd system32
4. Ren sethc.exe sethc_bak.exe
5. Copy cmd.exe sethc.exe
Step 6: Close the command window and then restart the computer to boot normally.
Step 7: When Windows 7 login screen appears, click “Ease of access” icon to open command prompt.
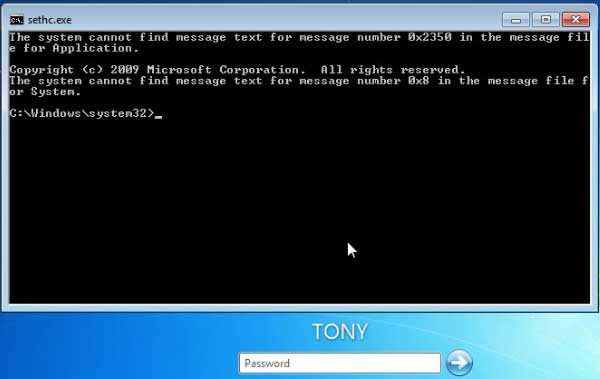
Step 8: In the command window, type “net user /add [username] key=[ password]” and then press Enter key. A new user account will be added to your Windows 7 system. If you need to add to admin group, refer to method 3. After that, close the command window and login Windows 7 with new admin account.
Method 5: Create New Admin Account for Windows 7 with Windows Password Rescuer. (Locked Out of Windows 7)
With help of Windows Password Rescuer, people can easily create new admin account to any Windows system without logging in. All you need is a bootable CD/USB flash drive. This is a fast way to get into a locked computer when you lose login password of Windows 7.
In this guide, I will show you how to create an admin account for a locked Windows 7 with USB flash drive. You also can follow this guide to create admin account for Windows 11, 10, 8.1, 8, Vista, XP and Windows server 2022, 2019, 2016, 2012/R2, 2008/R2, 2003/R2.
Step 1: Create a bootable USB with Windows Password Rescuer.
1. Download and install Windows Password Rescuer Personal on a working Windows computer. Plug a blank USB flash drive into the computer and launch the software.


2. Choose “USB Device" on the friendly interface.

3. Select the connected USB drive and then click “Begin Burning” button to continue.
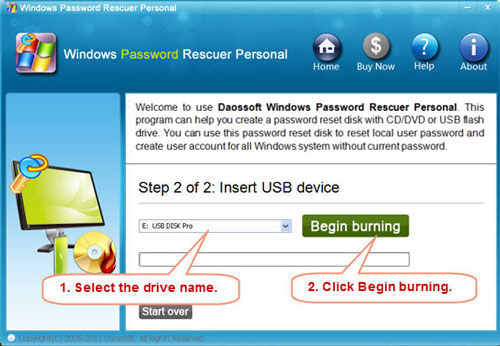
4. The rescuer will automatically create a bootable USB for you. Then unplug the USB flash drive.
Step 2: Boot your locked computer from the USB flash drive and create admin account for Windows 7 instantly.
1. Connect the USB flash drive to your locked computer and set the computer to boot from it. (Need help, refer to this page.)
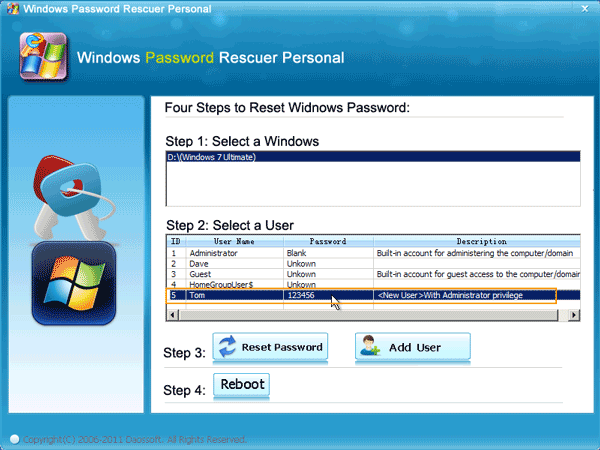
2. Wait computer boots from USB and loads Windows Password Rescuer. When you see the follow screen, select your Windows 7 system.

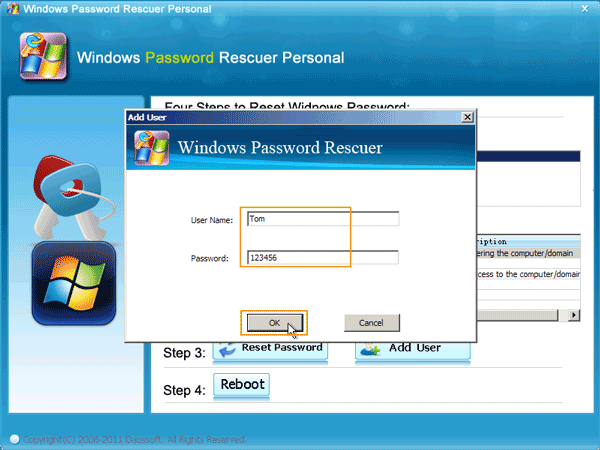
3. Click “Add User” button and then type in a new username and password. Click OK.
4. The newly created admin account will be shown in list.
5. Click “Reboot”. When a confirm message pops up, unplug your USB and then click “Yes”.
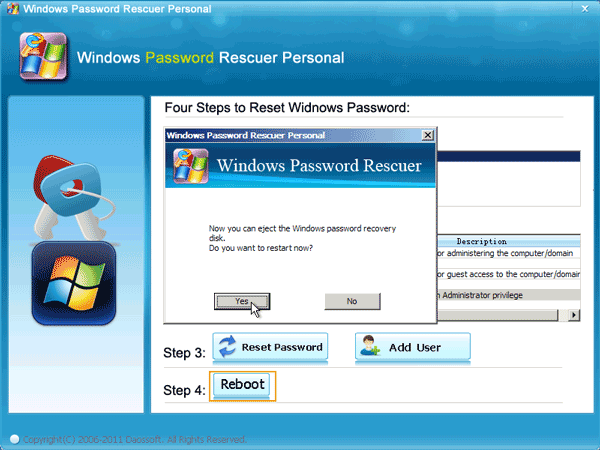
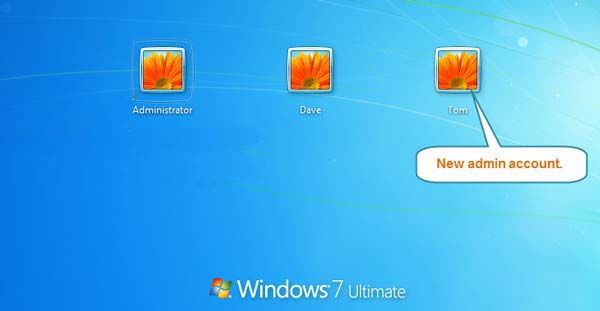
6. After restarting, the new admin account will be displayed on login screen. Select the account to sign in with your password.

Price: $ 17.95